There is something ridiculously charming about turning a handful of shells into a working little paint palette. It feels coastal, handmade, slightly imperfect in the best possible way, and exactly the sort of project that makes you look at your craft stash and think, “Well… clearly I was saving those shells for a reason.”
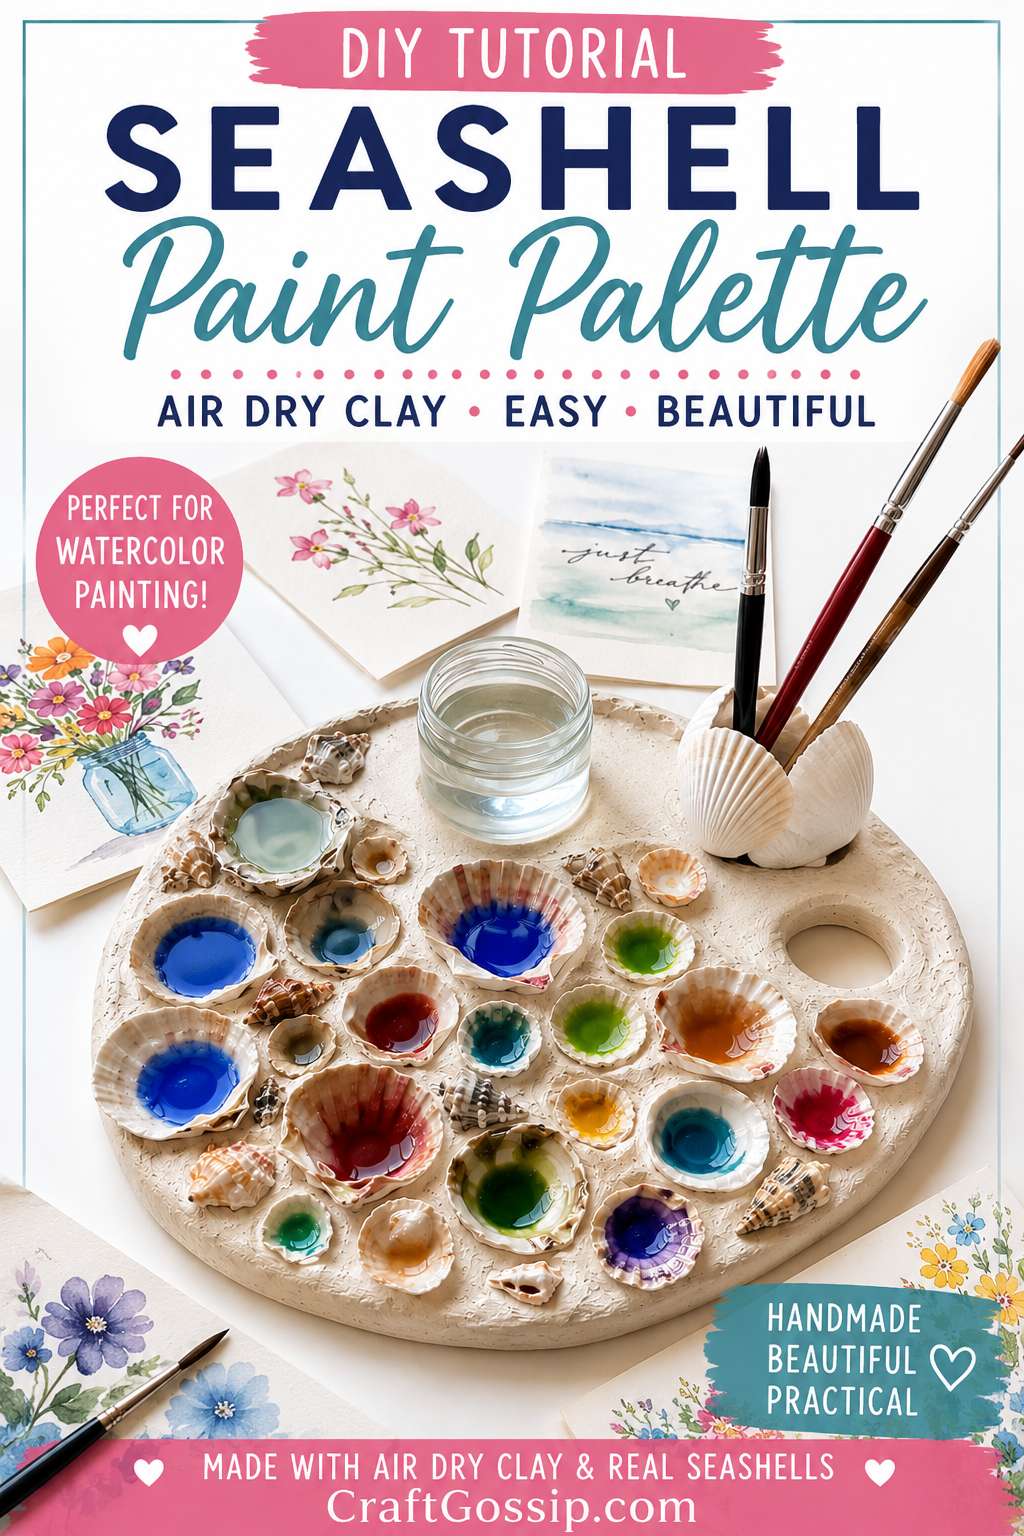
This air dry clay paint palette is shaped like a traditional artist’s palette, but made nice and thick so it feels sturdy on the table. The seashells are embedded into the clay to create little paint wells, there is a flat section to hold a small jar of water, and the brush holder is made from four white shells glued together so it looks like part of the design rather than an afterthought.
It is a lovely project for watercolor artists, beach lovers, coastal craft rooms, or anyone who enjoys handmade art supplies. It also makes a beautiful handmade gift if you have a painter in the family.
If you enjoy practical handmade craft room ideas, you might also like browsing our creative DIY projects on CraftGossip or using this alongside your favorite handmade card ideas for a pretty watercolor workspace setup.
DIY Air Dry Clay Seashell Paint Palette Tutorial
This project uses air dry clay, so there is no kiln or oven needed. The trick is to build the base thick enough to support the shells and water jar, but not so thick that it takes forever to dry. Air dry clay always has its own little personality, so expect a few natural bumps and handmade marks. Honestly, that is part of the charm.
Supplies You Will Need
Air dry clay, preferably white or natural stone color
Acrylic rolling pin or smooth glass bottle
Craft knife or clay cutting tool
Traditional paint palette template or hand-drawn oval shape
Assorted clean seashells in different sizes
Four white scallop-style shells for the brush holder
Small glass jar for water
Pencil or round tool for marking the water jar section
Strong craft glue or E6000-style adhesive
Small bowl of water for smoothing clay
Fine sandpaper
White acrylic paint or gesso
Clear waterproof sealer or varnish
Paintbrush for sealing
Optional: clay tools, sponge, texture tool, gold paint, pearl paint, or coastal embellishments
If you are making this as a serious working palette, use a good clear waterproof sealer. Air dry clay is absorbent, and watercolor needs a protected surface so the palette does not slowly turn into a soggy little craft tragedy.
Step 1: Prepare Your Seashells
Start by washing and drying all your shells thoroughly. Any sand, salt, or residue can stop the shells from bonding properly to the clay.
Choose a mix of shell sizes. Larger shells work beautifully for main watercolor wells, while tiny shells are perfect for small accent colors. Try to select shells that naturally sit slightly cup-shaped so they can hold paint.
For the brush holder, choose four white shells that are roughly the same height. They do not need to match perfectly, but they should be similar enough to glue together into a little upright cup shape.
Step 2: Roll Out A Thick Clay Base
Take a generous amount of air dry clay and knead it until it feels soft and workable.
Roll the clay out to around 1.5–2 cm thick. This needs to be thicker than a normal clay ornament because it has to hold the embedded seashells, the water jar area, and the brush holder.
Do not roll it too thin. Thin air dry clay can curl, crack, or break, especially once you start pressing shells into it.
Step 3: Cut A Traditional Paint Palette Shape
Draw or trace a traditional painter’s palette shape onto paper first. Think of a large oval or kidney shape with a thumb hole on one side.
Place the paper template over the clay and cut around it using a craft knife or clay tool.
Cut out the thumb hole as well. You can use a small round cutter, bottle lid, or carefully cut it freehand. Smooth the inside edge with a damp finger.
This traditional palette shape gives the project a lovely artist-style feel, even though it is made from shells and clay.
Step 4: Create A Flat Section For The Water Jar
Before placing any shells, decide where the water jar will sit.
Place the small glass jar onto the clay and lightly press it down to mark the circle. Do not press it all the way through. You just want a shallow, flat guide so the jar has a stable place to sit.
Use your fingers or a flat clay tool to smooth that area so it is level. This is important because you do not want a wobbly water jar sitting on top of a handmade palette. We have all knocked over enough craft water in our time, thank you very much.
Remove the jar before drying.
Step 5: Arrange The Seashell Paint Wells
Now comes the fun part.
Place your seashells onto the palette base before pressing them in. Move them around until the design looks balanced. Use larger shells near the front and middle, smaller shells around the edges, and leave enough open space for the water jar and brush holder.
Try to angle the shells so they feel naturally scattered but still practical. You want the final palette to look candid and handmade, but also usable.
Once you like the arrangement, gently press each shell into the clay. The clay should come up slightly around the shell edges to help grip them.
Do not fill every inch. A little breathing space makes it look more elegant and gives you room to clean between colors.
Step 6: Build Up Clay Around The Shells
Take small pieces of clay and press them around the base of each shell. This helps embed the shells securely and creates that organic handmade look.
Smooth the clay with damp fingers so it blends into the base. You do not need it perfectly flat. Little ridges and texture make it look like something made by hand, not something stamped out of a factory.
Pay extra attention to the larger paint wells. These need to be secure because they will hold the most paint and water.
Step 7: Make The Four-Shell Brush Holder
To create the brush holder, take your four white shells and arrange them upright in a small cluster, with the hollow sides facing inward. They should form a little cup or flower-like holder.
Use strong craft glue to attach the shells to each other first. Let that set until the shape feels stable.
Then press the shell cluster gently into the clay base where you want the brush holder to sit. Add extra clay around the bottom to anchor it firmly.
You can also add a small clay ring around the base of the shell holder for extra strength. Smooth it into the palette so it looks built in.
Before it dries, test the holder with a few paintbrushes. Make sure the opening is wide enough and that the brushes stand at a practical angle.
Step 8: Smooth And Strengthen The Edges
Go around the outside edge of the palette and smooth it with damp fingers.
If the clay has cracked slightly from cutting or shaping, patch it with a little fresh clay and water. Air dry clay is forgiving while it is still wet, so this is the time to tidy everything up.
You can leave the surface slightly textured for a natural stoneware look, or smooth it more if you prefer a cleaner finish.
Step 9: Let The Palette Dry Slowly
Place the palette on a flat surface and let it dry according to the clay packet instructions. This will usually take 24–72 hours, depending on the thickness of the clay.
Because this base is thick, slow drying is best.
To help prevent warping, turn the palette carefully once the top feels firm enough to handle. If you are worried about the shells shifting, wait longer before moving it.
Do not rush this step with heat. Air dry clay can crack if it dries too quickly.
Step 10: Sand Any Rough Areas
Once the palette is completely dry, lightly sand any sharp or rough edges.
Use fine sandpaper and work gently around the shells. You do not want to scratch the shells, just soften the clay edges.
Wipe away any dust with a dry cloth before painting or sealing.
Step 11: Paint The Clay Base
If you used white air dry clay and like the natural finish, you can leave it as is. For a cleaner coastal look, paint the base with white acrylic paint or gesso.
A warm off-white looks especially pretty with natural seashells. You can also add a little pearl paint or very soft beige dry brushing if you want it to look more ceramic.
Avoid painting inside the shell wells unless you are going for a fully painted decorative piece. Natural shells make lovely watercolor wells because the texture and color variations add so much character.
Step 12: Seal The Entire Palette
This is the most important step if you want the palette to be usable.
Apply several thin coats of clear waterproof sealer over the clay areas. Let each coat dry fully before adding the next.
Seal around the bases of the shells carefully so water cannot seep into the clay. You can also seal the shells themselves if you want them glossy and easier to wipe clean.
For a working watercolor palette, a gloss or satin waterproof varnish will make cleaning easier. Matte sealer looks lovely, but it may stain more quickly.
Step 13: Add Your Water Jar And Brushes
Once everything is fully sealed and cured, place your small water jar onto the flat section.
Add your brushes to the four-shell holder and fill the shell wells with watercolor paint.
For the prettiest workspace photo, scatter a few handmade watercolor cards nearby. Think loose florals, soft coastal washes, little botanical doodles, or in-process greeting cards. A white table or white background makes the shells and paint colors really pop.
Tips For Making It Work Better
Use lightweight shells where possible so the palette does not become too heavy.
Press shells into the clay deeply enough that they are secure, but not so deep that the paint wells disappear.
Leave a flat space around the water jar area. It looks pretty surrounded by shells, but the jar still needs room to sit safely.
Use a small jar rather than a tall one. A low glass jar is less likely to tip over.
Seal more than you think you need. Air dry clay and water are not best friends unless you protect the clay properly.
Creative Variations
You could make a smaller travel-style shell palette with fewer wells and no water jar section.
For a beach wedding or coastal art class, make mini versions as handmade place cards or favors.
Add a gold-painted rim around the palette edge for a more elegant look.
Use only white shells for a minimalist artist palette, or mix natural shells for a more beachcombed feel.
Create a matching air dry clay brush rest using one long shell pressed into a small clay base.
What To Use It For
This handmade shell paint palette is perfect for watercolor painting, handmade card making, journaling, coastal craft displays, and pretty craft room styling. It also makes a lovely handmade gift for an artist, especially if you pair it with a few watercolor paints, blank cards, and a good detail brush.
If you are using this for handmade cards, keep a few blank watercolor card bases nearby. A little stack of floral cards beside the palette makes the whole workspace feel inviting, useful, and very Pinterest-friendly.
And yes, this is absolutely one of those projects where you make one for yourself first “just to test it,” then immediately start planning who else needs one. Because apparently even our paint palettes need to be cute now.