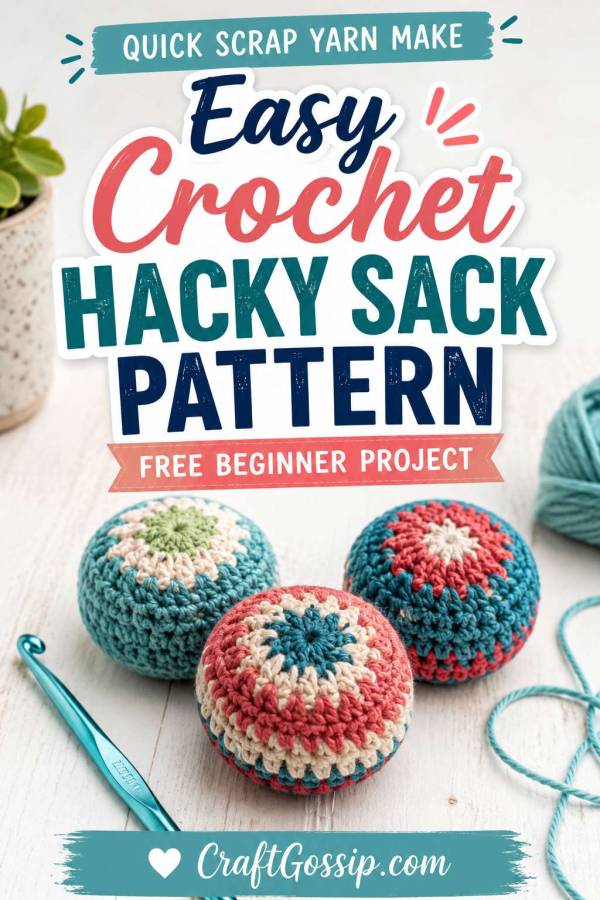
This easy crochet hacky sack pattern is a fun little stash-busting project for beginners. Use cotton yarn, simple single crochet stitches, and your favourite filling to make a soft handmade footbag for outdoor play, juggling practice, or nostalgic handmade gifts.
There is something wonderfully nostalgic about a hacky sack. It feels like one of those simple childhood things that somehow survived every trend — no batteries, no screens, no charger cables hiding under the sofa. Just a little handmade ball, a few willing feet, and someone inevitably saying, “Wait, let me try that again.”
This easy crochet hacky sack pattern is a brilliant beginner crochet project because it uses basic stitches, works up quickly, and gives you something useful at the end. It’s also a lovely scrap yarn project if you have small balls of cotton hiding in your stash. You know the ones — too small for a dishcloth, too nice to throw away, and currently living rent-free in the bottom of a basket.
A crocheted hacky sack, also called a crochet footbag, is a small soft ball filled with rice, pellets, lentils, beads, or another weighted filling. It can be used for casual outdoor play, juggling practice, party games, or as a handmade stocking stuffer for kids, teens, and adults who still enjoy a good throwback.
If you like quick crochet projects, you might also enjoy the older CraftBits crochet hacky sack foot bag pattern.
A crochet hacky sack is small, portable, practical, and surprisingly satisfying to make. It’s the kind of crochet project you can finish in an evening, which makes it perfect when you want a quick win between bigger blankets, shawls, or those “I’ll finish it one day” cardigan projects.
It’s also a great handmade gift for kids and teens because it feels playful without being overly babyish. Make a few in bright colours and they’re perfect for summer holidays, camping trips, youth groups, classroom rewards, party favours, or backyard games.
For adults, it’s a fun nostalgic make. If you grew up watching people play hacky sack at school, in parks, or at festivals, this little crochet project will take you right back.
Cotton yarn is usually the best choice for a crochet hacky sack because it creates a firm fabric and holds up well to handling. Acrylic yarn can work, especially for a softer indoor version, but cotton gives the finished footbag a neater shape and less stretch.
Look for a worsted weight cotton yarn or DK cotton if you want a smaller, tighter hacky sack. If your stitches are loose, go down a hook size so the filling doesn’t escape through the gaps.
This is a good project for leftover cotton yarn from dishcloths, market bags, amigurumi, or small home decor makes. If you need supplies, Amazon is handy for cotton yarn, crochet hooks, stitch markers, and filling pellets. Mary Maxim is also worth browsing for cotton yarn and small crochet supply bundles, especially if you’re building up a beginner crochet stash.
The filling changes how the hacky sack feels and plays. You want it weighted enough to drop nicely, but not so heavy that it feels hard or uncomfortable.
Good filling options include:
Plastic craft pellets
Poly pellets
Dried rice
Lentils
Dried beans
Birdseed
Small glass beads
Aquarium gravel sealed inside a fabric pouch
For a child-friendly version, use larger filling materials and place them inside a small fabric pouch before inserting them into the crochet shell. This helps prevent tiny pieces from escaping if the stitches stretch over time.
If the hacky sack is for very young children, avoid small loose fillings and always supervise play. This is not suitable as a toy for babies or toddlers.
This pattern makes a small crochet hacky sack measuring approximately 2.5 to 3 inches across, depending on yarn, hook size, tension, and filling.
The size is easy to adjust by changing yarn weight or adding/removing rounds before decreasing.
Beginner friendly.
You should know how to:
Make a magic ring or chain ring
Single crochet
Increase
Decrease
Work in continuous rounds
Fasten off and weave in ends
If you are brand new to crochet, this is a nice small project for practising increases and decreases because you can see the shape forming quickly.
Worsted weight cotton yarn or DK cotton yarn
Crochet hook suited to your yarn, usually 3.5 mm to 4.5 mm
Stitch marker
Yarn needle
Small funnel or paper cone for filling
Poly pellets, rice, lentils, birdseed, or preferred filling
Optional: small scrap of cotton fabric for a filling pouch
This pattern uses US crochet terms.
ch – chain
sc – single crochet
inc – increase, work 2 single crochet stitches into the same stitch
dec – decrease, single crochet 2 stitches together
st – stitch
sts – stitches
sl st – slip stitch
This hacky sack is worked in continuous rounds. Do not join at the end of each round unless you prefer to. Use a stitch marker to mark the first stitch of each round.
Make a magic ring and work 6 sc into the ring. Pull tight.
6 sts
Inc in each stitch around.
12 sts
Sc in next st, inc in next st. Repeat around.
18 sts
Sc in next 2 sts, inc in next st. Repeat around.
24 sts
Sc in next 3 sts, inc in next st. Repeat around.
30 sts
Sc in next 4 sts, inc in next st. Repeat around.
36 sts
Sc in each stitch around.
36 sts
This creates the middle section of the hacky sack. If you want a slightly taller or rounder footbag, add one or two extra plain rounds here.
Sc in next 4 sts, dec. Repeat around.
30 sts
Sc in next 3 sts, dec. Repeat around.
24 sts
Sc in next 2 sts, dec. Repeat around.
18 sts
Pause here to add the filling.
Before closing the final rounds, fill the hacky sack until it feels soft but weighted. You want it to be flexible enough to squish slightly, not packed firm like a beanbag brick.
If using loose rice, lentils, birdseed, or small pellets, it’s a good idea to pour the filling into a small fabric pouch first. Cut a small circle or square of cotton fabric, add the filling, gather it tightly, and stitch or tie it closed before placing it inside the crochet shell.
You can also use the toe section of an old clean stocking as an inner pouch. Tie it securely and trim any extra.
Once filled, continue crocheting.
Sc in next st, dec. Repeat around.
12 sts
Dec around.
6 sts
Fasten off, leaving a long tail. Thread the tail through a yarn needle and weave it through the front loops of the remaining stitches. Pull tight to close the hole. Secure the yarn and weave in the end carefully.
Roll the finished hacky sack gently in your hands to even out the filling and shape.
Use a smaller hook than you normally would for the yarn. This creates tighter stitches and helps stop the filling from showing through.
Do not overfill the hacky sack. It should have some movement inside so it drops nicely when kicked or tossed.
Choose cotton yarn for better stitch definition and durability.
Use a stitch marker. Continuous rounds are easy until the phone rings, the dog barks, or someone asks where the scissors are.
If the filling peeks through, make a fabric inner pouch next time.
Make the first one as your practice version. The second one will almost always look neater.
This is a lovely project for using up small yarn scraps. To make stripes, change colour every two rounds or use a different colour for the middle section.
A simple stripe plan:
Rounds 1–3: Colour A
Rounds 4–6: Colour B
Rounds 7–9: Colour C
Rounds 10–12: Colour B
Rounds 13–17: Colour A
You can also make each hacky sack in team colours, rainbow colours, school colours, or soft neutrals for a more modern handmade gift look.
A handmade crochet hacky sack can be used in lots of simple ways:
Outdoor footbag games
Juggling practice
Hand-eye coordination games
Party favours
Stocking stuffers
Classroom movement breaks
Camping games
Youth group activities
Quick handmade gifts
Make a set of three if you want to use them for juggling. For a family game night or backyard party, make several in different colours so everyone can choose their own.
This depends on the filling.
If you use plastic craft pellets inside a secure pouch, the hacky sack may be gently hand washed and air dried. If you use rice, lentils, beans, or birdseed, do not wash it, as the filling can swell, spoil, or become unpleasant.
For outdoor use, darker colours are more forgiving. Ask me how I know. A cream cotton hacky sack sounds lovely until it has spent one afternoon being kicked around the grass.
If this project is for children, always think about the filling and seams. Loose rice, birdseed, beans, or pellets can be a choking hazard if they escape.
For a safer version:
Use tight crochet stitches
Place filling inside a stitched fabric pouch
Check the finished hacky sack regularly for wear
Avoid giving it to babies or toddlers
Supervise young children during play
For older kids, teens, and adults, this makes a fun low-cost handmade toy.
If you enjoyed making this easy crochet hacky sack, you might like more small projects that use leftover yarn and work up quickly.
Try the original CraftBits crochet hacky sack foot bag for another simple version, or browse more free crochet patterns on CraftBits for quick handmade ideas.
For outdoor play and handmade game ideas, this CraftGossip roundup of crochet yard games you can make is a fun place to keep browsing.
A crochet hacky sack is one of those tiny projects that feels much more useful than it looks at first glance. It uses up scrap yarn, teaches shaping, makes a fun handmade toy, and gives you a finished project in very little time.
Make one as a quick beginner crochet project, make a set for outdoor games, or tuck a few into stockings and gift baskets. They’re simple, cheerful, practical, and just a little bit nostalgic — which is exactly the kind of handmade project I never mind making twice.