If you’ve ever stared at a little pile of ribbon offcuts and thought, I can’t throw that away… but what on earth will I do with it? — pull up a chair. This is one of those gloriously practical junk journal techniques that turns “craft clutter” into textured magic.
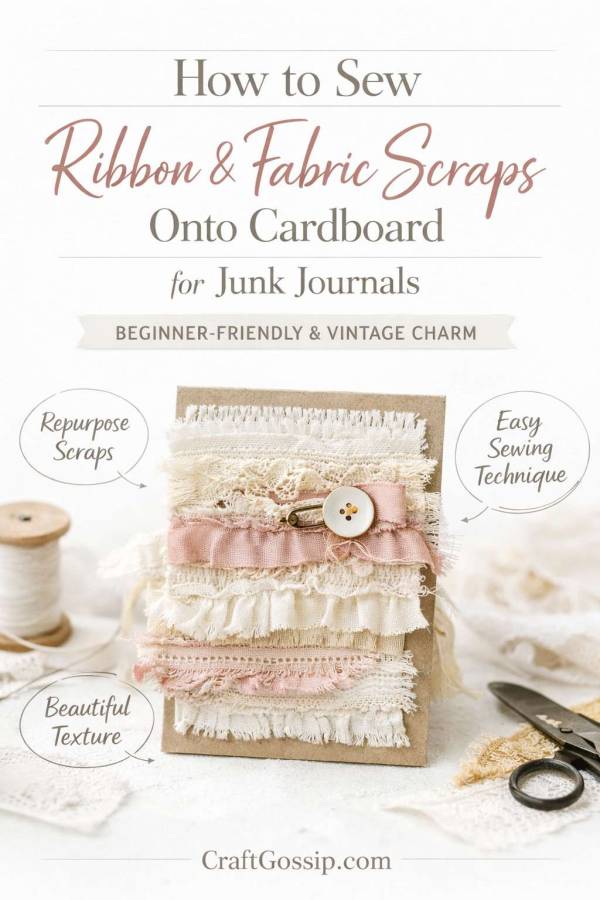
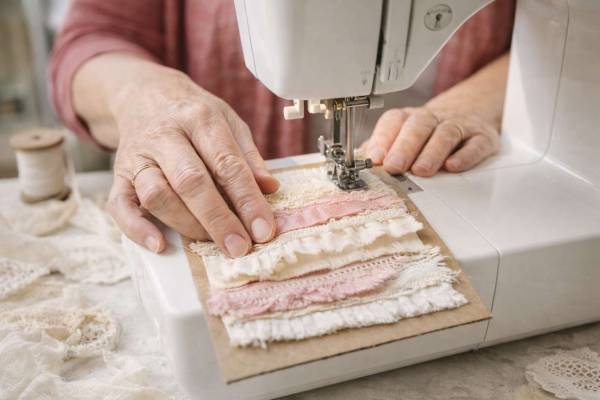
One afternoon (while “tidying” my craft table — which really means rearranging the chaos into prettier chaos), I started sewing ribbon and fabric scraps directly onto cereal box cardboard. Nothing fancy. No expensive chipboard. Just recycled packaging and a pile of lace, seam binding, and cotton strips.
What came out of that little experiment? Some of my favourite textured junk journal covers and embellishment panels ever.
If you love vintage junk journals, shabby chic layers, soft textile details, and meaningful handmade elements — this technique is going to be your new obsession.
Why Sew Ribbon and Fabric Scraps Onto Cardboard for Junk Journals?
Let’s talk structure and texture — because that’s really what makes junk journals special.
Cardboard gives you:
- Stability
- Durability
- A firm base for stitching
- A recycled, eco-friendly foundation
Fabric and ribbon scraps give you:
- Softness
- Dimension
- Movement
- That layered, vintage feel we all adore
Together? They create sturdy, tactile journal elements that look beautifully complicated — but are actually very beginner-friendly.
This technique works beautifully for:
- Junk journal covers with fabric detail
- Layered pockets and tuck spots
- Decorative journal cards
- Mixed media backgrounds
- Vintage-style embellishment panels
- Memory or keepsake junk journals
And yes… once you start doing this, you’ll begin saving every scrap of lace and muslin like it’s treasure.
Supplies for Sewing Fabric Scraps Onto Cardboard
You likely already have everything you need tucked away in your craft stash.
Cardboard Base
- Cereal boxes
- Packaging cardboard
- Lightweight chipboard
Fabric & Ribbon Scraps
- Cotton
- Muslin
- Silk ribbon
- Vintage lace trims
- Cheesecloth
- Seam binding
- Torn fabric strips
Tools
- Sewing machine (or needle and thread)
- Glue stick (optional for stabilising)
- Double-sided tape (optional)
- Paper backing (optional for finishing the back)
This is a wonderful recycled junk journal technique — perfect for anyone building journals from thrifted or household materials.
Choosing the Right Cardboard for Junk Journals
If you’re sewing onto cardboard, thinner is better.
Cereal box weight cardboard is ideal because:
- It’s sturdy but flexible
- Your sewing machine can stitch through it easily
- It layers well if you need more thickness
Avoid heavy corrugated cardboard unless you’re planning to hand stitch.
For junk journal covers, you can always glue two cereal box layers together after stitching if you want extra strength.
How to Sew Ribbon and Fabric Scraps Onto Cardboard (Step-by-Step)
Step 1: Cut Your Cardboard Base
Trim your cardboard to the size you need:
- Journal cover
- Tag base
- Pocket panel
- Journal card
If you’re making a junk journal cover, measure your inside pages first so everything aligns neatly.
Step 2: Arrange Your Fabric and Ribbon Scraps
Lay your fabric and ribbon strips directly onto the cardboard.
Overlap slightly to create:
- Layered texture
- Ruffled edges
- Organic depth
Do not aim for perfection. Frayed edges, raw hems, and uneven lines are exactly what make vintage junk journals charming.
If things slide around, lightly glue the first layer down with a glue stick. Just a little — you don’t want thick glue blobs under your needle.
Step 3: Stitch Through the Layers
Using a basic straight stitch, sew directly through the cardboard and fabric layers.
You can:
- Sew tidy parallel rows
- Stitch randomly for rustic texture
- Use zigzag stitch for extra hold
- Leave thread tails long for added interest
A sewing machine handles cereal box cardboard beautifully. Just go slowly over thicker areas.
If hand sewing:
- Use a sharp needle
- Consider a thimble
- Pre-poke holes with an awl if needed
This step is where the magic happens. The stitching secures everything and adds beautiful linear detail across the textile layers.
Step 4: Trim and Distress
Trim excess fabric from the edges.
For that aged, shabby chic junk journal look:
- Lightly sand the cardboard edges
- Gently fray fabric edges
- Ink edges with distress ink
These small touches elevate your finished panel from “scrap experiment” to “vintage heirloom aesthetic.”
Step 5: Cover the Back (Optional but Recommended)
The back will show stitching threads.
For a polished finish:
- Glue coffee-stained paper
- Add patterned scrapbook paper
- Use vintage book pages
This is especially helpful for junk journal covers, gift journals, or keepsake albums.
Creative Ways to Use Sewn Cardboard Panels in Junk Journals
Fabric-Embellished Junk Journal Covers
Sew wide ribbon strips onto a cardboard base, then bind your pages inside. Add a charm, old key, or tiny tag for extra detail.
The textile softness against structured cardboard feels incredible in your hands.
Layered Pockets and Tuck Spots
Cut stitched panels into pocket shapes and glue into your journal pages. The fabric edge peeking out adds instant dimension.
Vintage Journal Cards & Inserts
Use smaller stitched panels as decorative inserts. Stamp dates, botanical labels, or handwritten quotes for an antique ledger feel.
Memory or Sympathy Journals
This technique is deeply meaningful.
Sew lace from a loved one’s sewing box onto cardboard. Add fabric from a treasured garment. These layers hold memory in a way paper alone cannot.
It transforms a junk journal into a true keepsake.
Best Fabrics and Ribbons for Textured Junk Journals
For rich texture and visual contrast, try:
- Vintage lace trims
- Silk ribbon
- Hand-dyed seam binding
- Muslin strips
- Cheesecloth
- Torn cotton fabric
- Velvet ribbon for romantic themes
Soft fabric against firm cardboard creates that beautiful tension between structure and softness — and that’s what makes the design so compelling.
Tips for Sewing on Cardboard Without Damaging Your Machine
If you’re new to sewing through cardboard, here’s how to protect your machine:
- Use a fresh needle
- Stick to thin cardboard
- Avoid sewing through thick glue
- Go slowly over bulky areas
- Always test on a scrap first
I’ve stitched dozens of junk journal panels this way over the years and never harmed a machine. Slow and steady really does win here.
Why This Technique Works So Beautifully for Vintage Junk Journals
Texture tells a story.
When you sew ribbon and fabric scraps onto cardboard, you create layers that feel aged, repaired, and handled. It mimics old book spines patched with cloth, ledgers reinforced over time, and heirloom journals passed through generations.
For those of us who love nostalgic crafting, recycled materials, and meaningful handmade projects, this is one of those techniques that feels both creative and comforting.
And let’s be honest — using up scraps feels wildly satisfying. Almost as satisfying as finishing a project before starting three new ones.
Almost.
If you’re building a junk journal from recycled materials, learning how to sew ribbon and fabric scraps onto cardboard is a technique worth adding to your creative toolbox.
It’s:
- Budget-friendly
- Beginner-friendly
- Eco-conscious
- Perfect for shabby chic junk journals
- Ideal for vintage botanical albums
- Beautiful for memory keepsake books
Next time you reach for the bin with that bit of ribbon in hand — pause.
Stitch it onto cardboard instead.
You might just create your favourite junk journal cover yet.